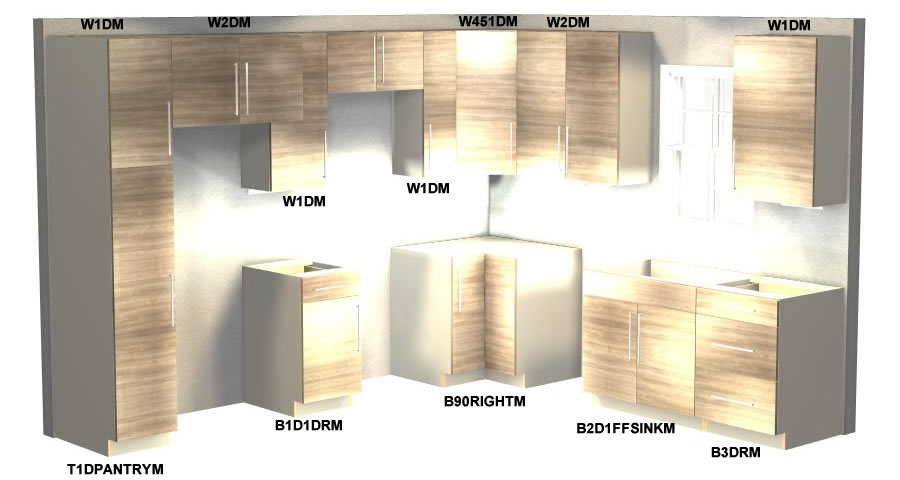
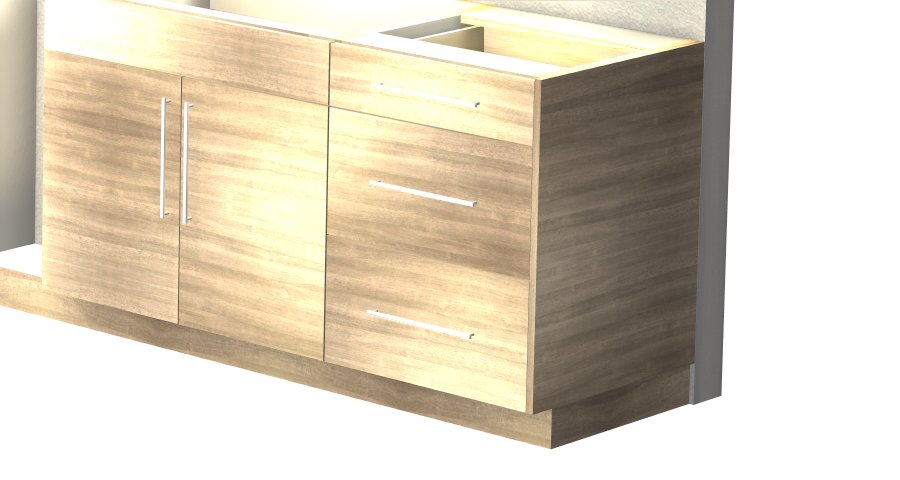
Cabinet layout is rather simple for this kitchen. Start with a 36" wide sink cabinet centered on the window. Try to keep your sink cabinet at 36" wide as this will fit most sinks on the market. Next we will add a base 90 cabinet in the corner. You will need 24" of clear space between the corner cabinet and the sink cabinet for standard width dishwashers. Expand or decrease the width of the sink cabinet accordingly to maintain a 24" of dishwasher space (keep the sink cabinet centered on the window while adjusting). To the right of the sink cabinet place a three drawer base cabinet and expand to the end of the wall leaving 3/4" of extra space. The extra space will be occupied by a finished end panel.
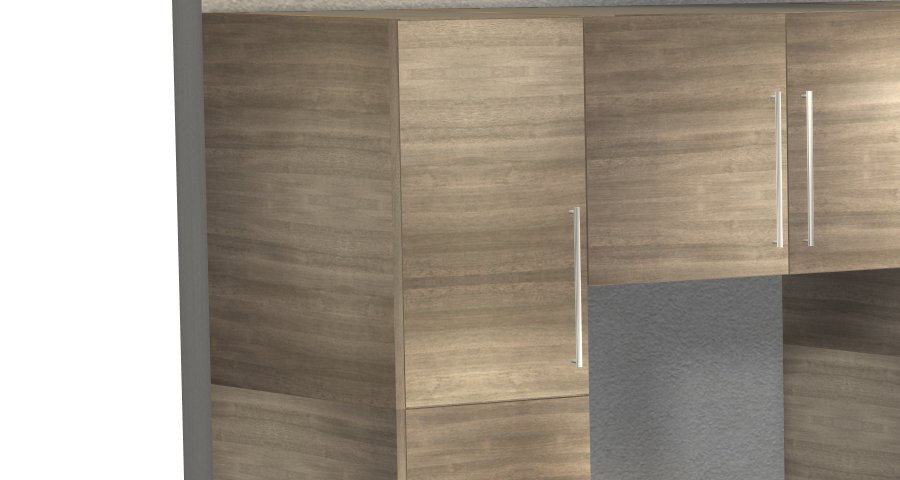
To the left of the base 90, leave 30" of space for the range (adjust according to the range specifications if needed). Add a standard base cabinet (one door/one drawer cabinet was used for this example). Leave 36.75" of space to the left of the base cabinet for a refrigerator opening (adjust according to your appliance specs if needed). The extra 3/4" space will be used by a tall finished end panel to enclose the refrigerator. Next, we will add a tall pantry cabinet at 64" in height and stack an additional 1 door wall cabinet on top. The wall cabinet will be 28" tall and the same depth as the pantry cabinet. Tall cabinet stacks should be 26" deep. Be sure to leave 3/4" space on the left side of the cabinet for the tall finished end panel. The sum of the two cabinets will achieve 92" of total height. This allows 4" of extra space at the top for crown molding to touch the ceiling.
To the right of the pantry/wall cabinet stack, we will add a 36" wide 2 door wall cabinet over the refrigerator opening. Bottom of the wall cabinet will be at about 72" elevation up from the top of the finished floor, adjust height accordingly after reviewing appliance specs for your refrigerator. Leave 3/4" space for your tall finished end panel that encloses the refrigerator to the right of this cabinet.
Next, we will add a 1 door wall cabinet and then a 2 door vented hood cabinet to the left of this. The hood being used is 30" wide total, so we will order the vented hood cabinet at 31.50" to account for the finished end panels that are needed to cover the exposed sides of the wall cabinets in the hood opening. The vented hood cabinet will essentially rest on top of the finished ends that are attached to the wall cabinets on each side of the opening.
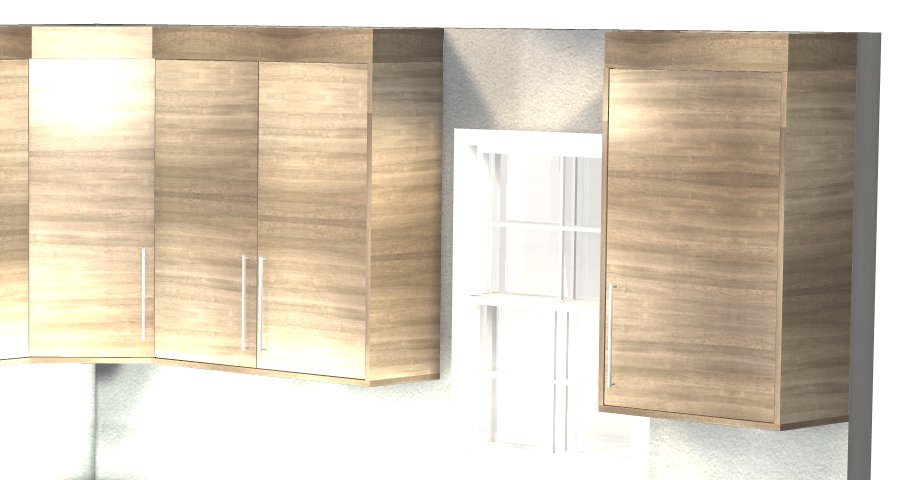
Add a wall 45 degree wall cabinet to the corner. After turning the corner, we will add a 2 door wall cabinet that will expand to the window trim on the right side. Stay back away form the widow trim by about 2" to 5". Try not to get too close and be sure to factor in 3/4" of extra space for the finished end panel needed there. On the right side of the window you will use a one door wall cabinet. Again, ensure that you have the finished end panel accounted for on each side of this wall cabinet.
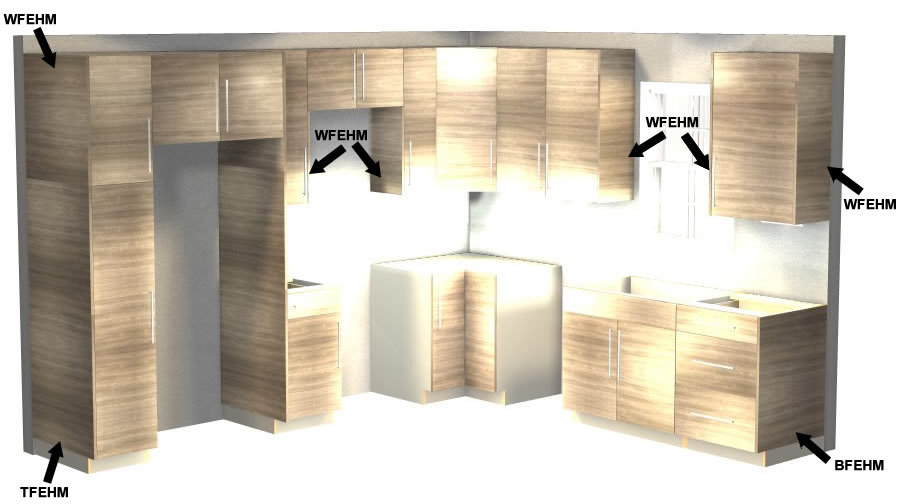
In this graphic we are showing the finished end panels being added into the project. For the finished ends, you can use horizontal or a vertical grain orientation. The end panels do not need to be the same grain direction as the face of the cabinets. During this tutorial we will have horizontal grain end panels as well as Horizontal grain cabinet doors and drawer fronts. The downside to using horizontal grain on the end panels is that the height is limited to 80" tall on the tall end panels. To maintain horizontal grain here, you will need to order two separate end panels (one tall, one wall) and stack them on top of each other. The combination will allow you to get a horizontal end panel over the 80" height maximum.
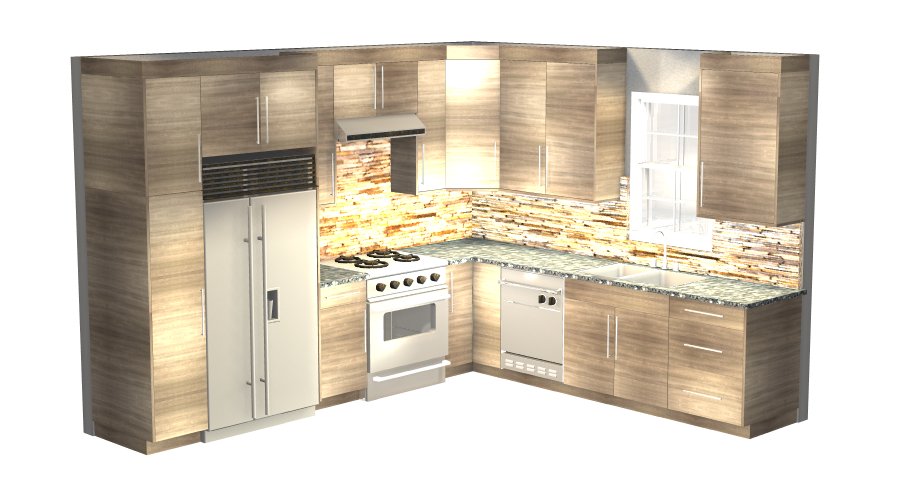
Millwork will be used to trim out the cabinets. Starting at the top, we added a 4" tall flat crown. The light rail used was our simple square trim at 3/4" height, nice and simple. The exposed gray toe kick was covered using the standard toe skin product. These millwork pieces are cut to length on site to allow for custom installation by your cabinet installer.
After millwork has been added we have put in a countertop and backsplash to show the detail of the new kitchen design.